Applicable Scope
This guide applies to Gate Web3 Wallet Google Chrome Extension
Before you start: Install the Gate Web3 Wallet Chrome Extension from the Chrome Web Store
Estimated time: 5 m
Objective
This guide will walk you through how to deposit and transfer funds using Gate Web3 Wallet on Gate Web.
Steps
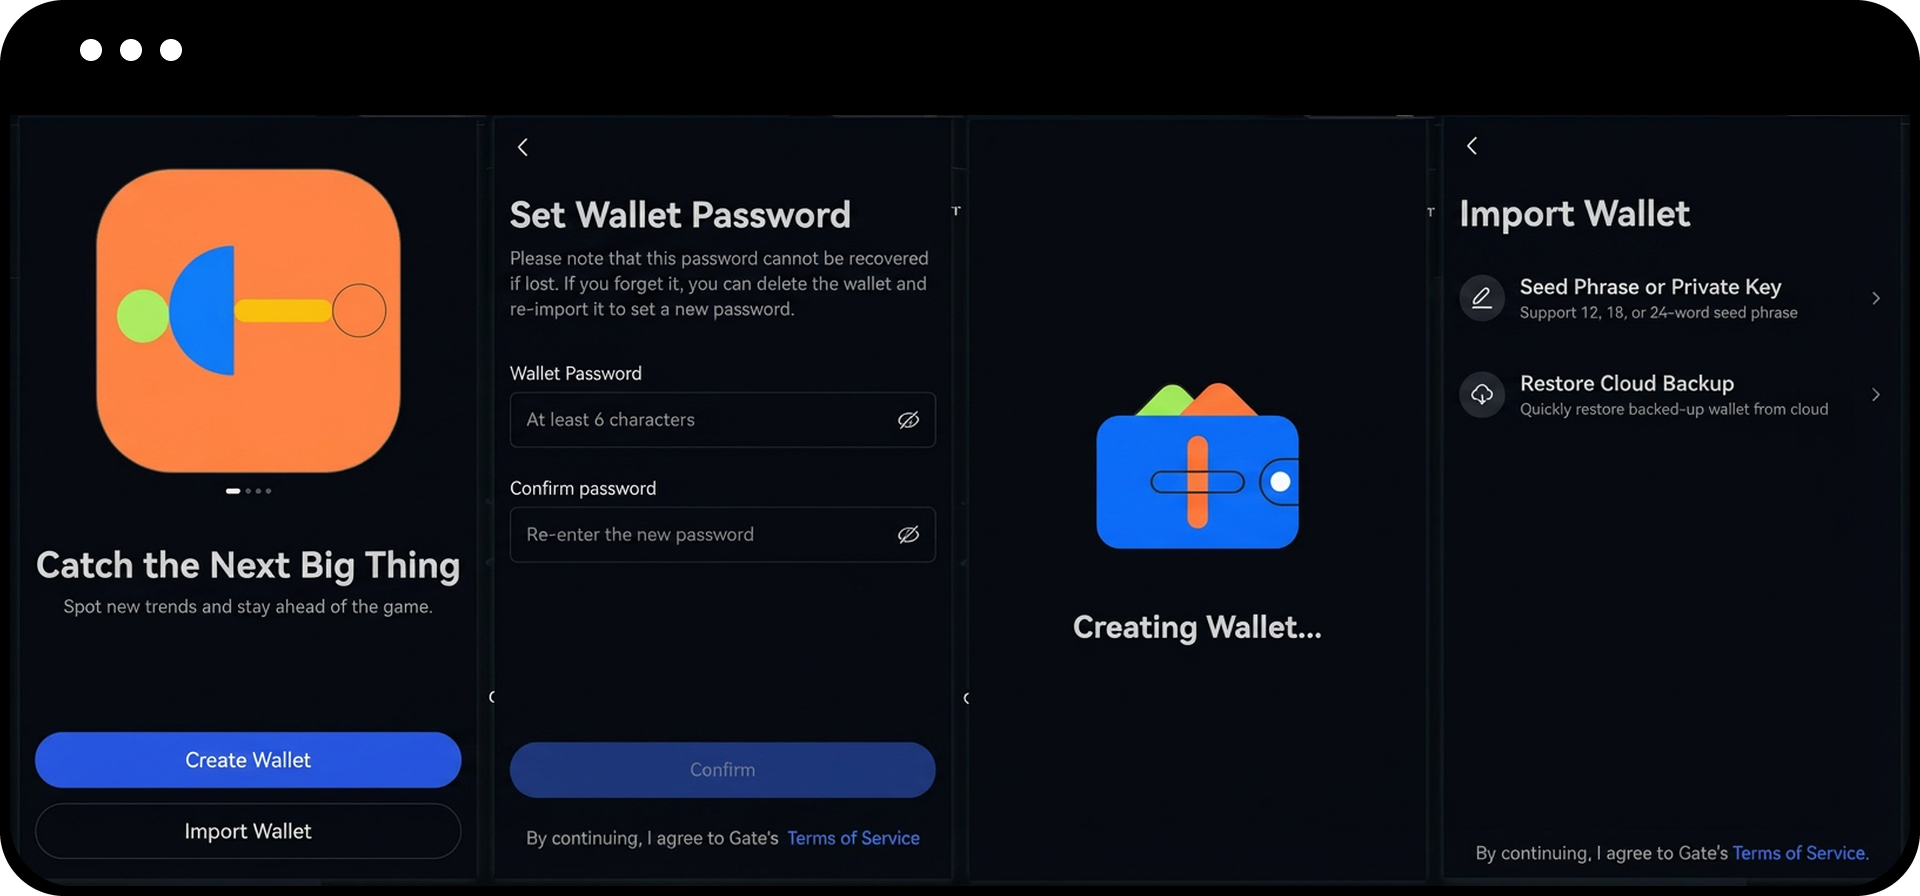
Step 1: Set Up Your Gate Web3 Wallet
- Open the Gate Web3 Wallet Google Chrome Extension.
- Choose one of the following options to set up your wallet:
- Create Wallet: Select "Create Wallet" and enter a password to create a new wallet
- Import Wallet: Select "Import Wallet" and enter your mnemonic phrases or private key to import an existing wallet
- Restore Cloud Backup: If you have previously backed up your wallet in the Gate App, click "Restore Cloud Backup" and enter your password
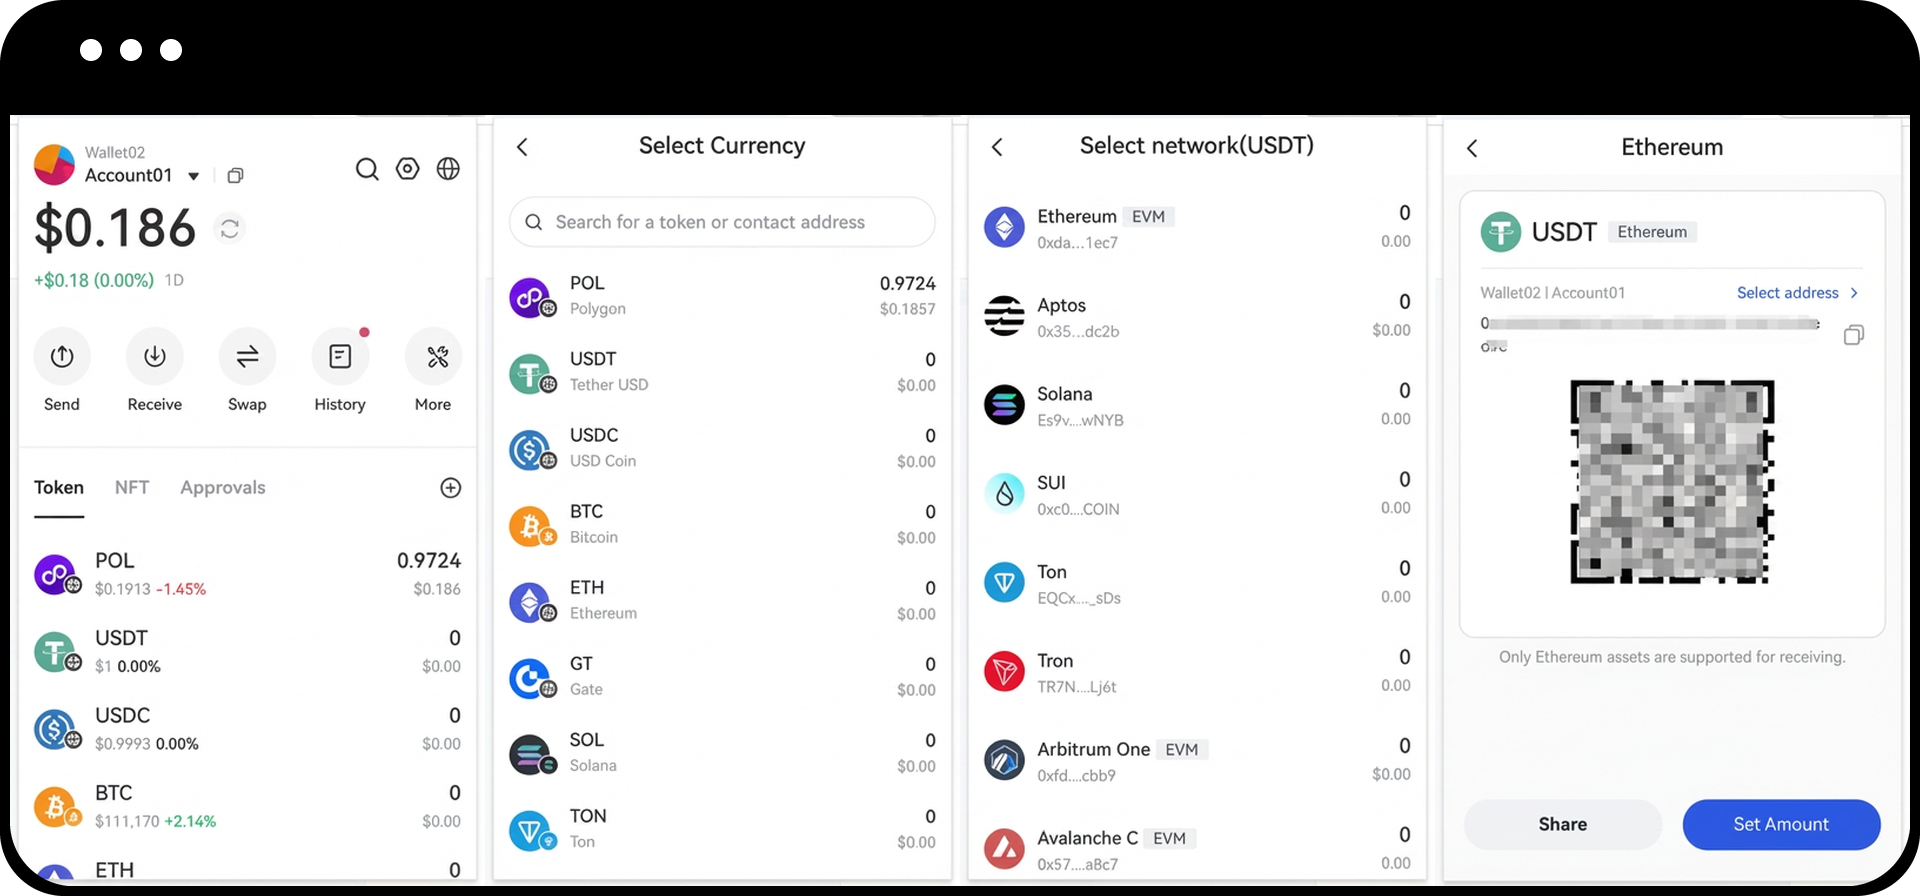
Step 2: Deposit Funds to Your Wallet
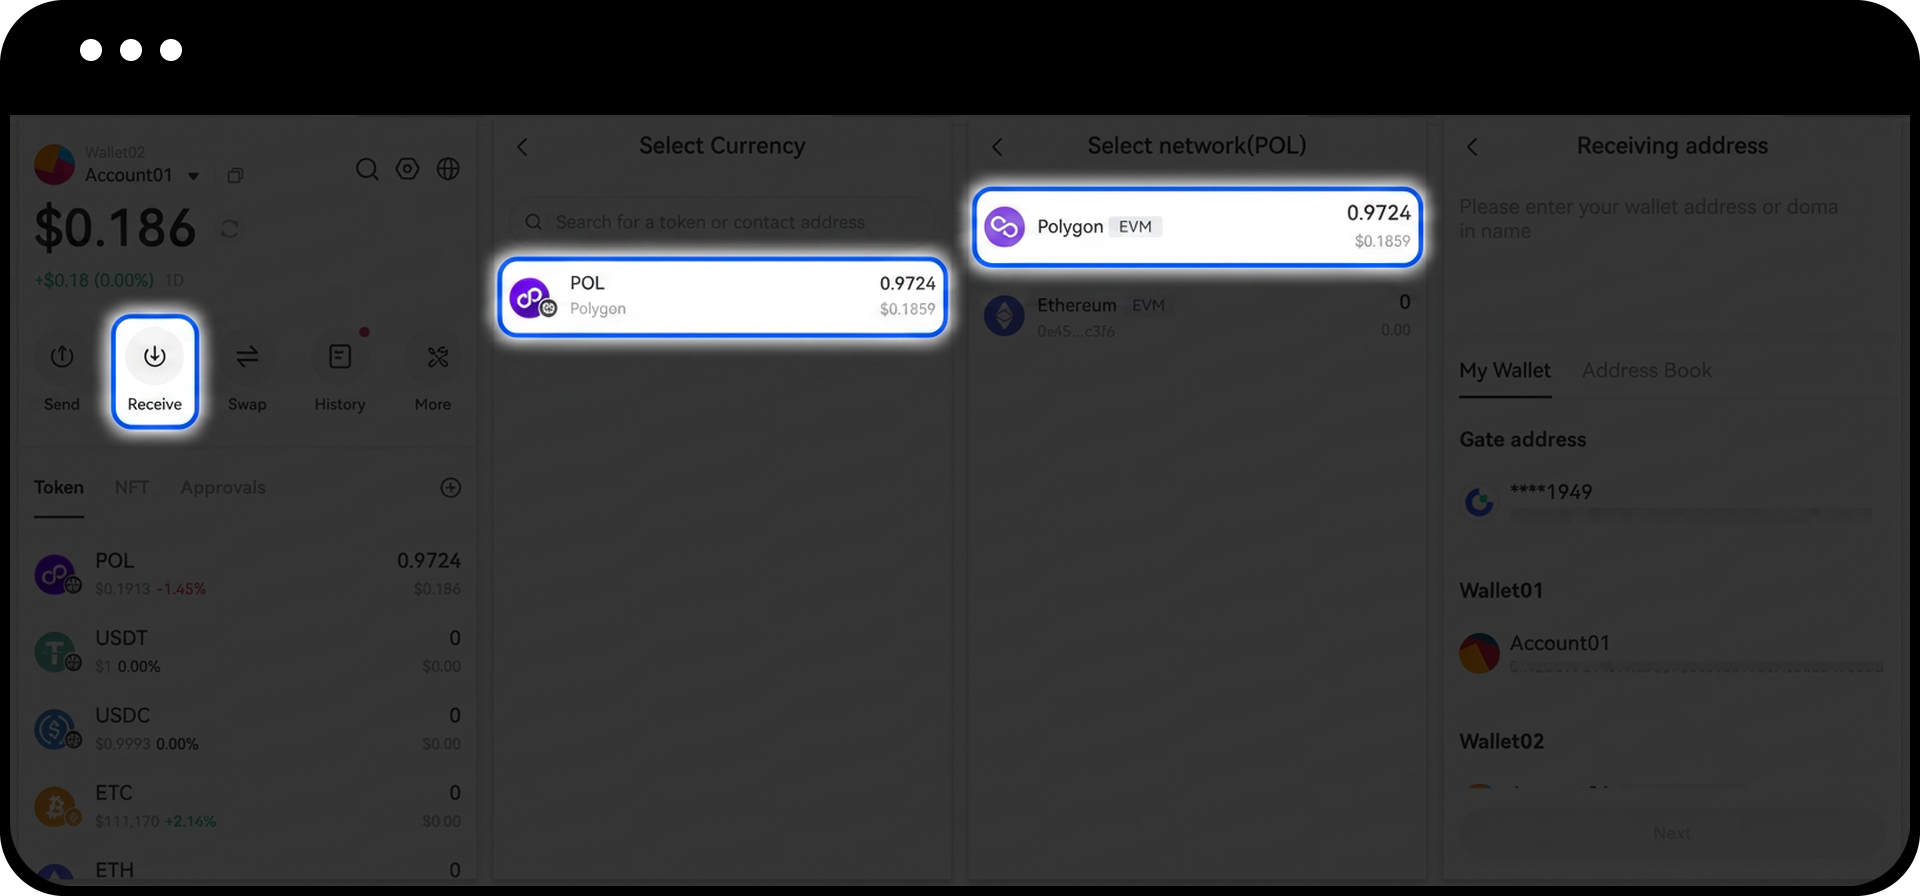
- On the Google Chrome Extension homepage, click the "Receive" button.
- Select the deposit token and token network you wish to receive.
- Copy the receiving address displayed.
- Navigate to the platform or wallet where you want to send funds from, and paste the copied address into the recipient address field.
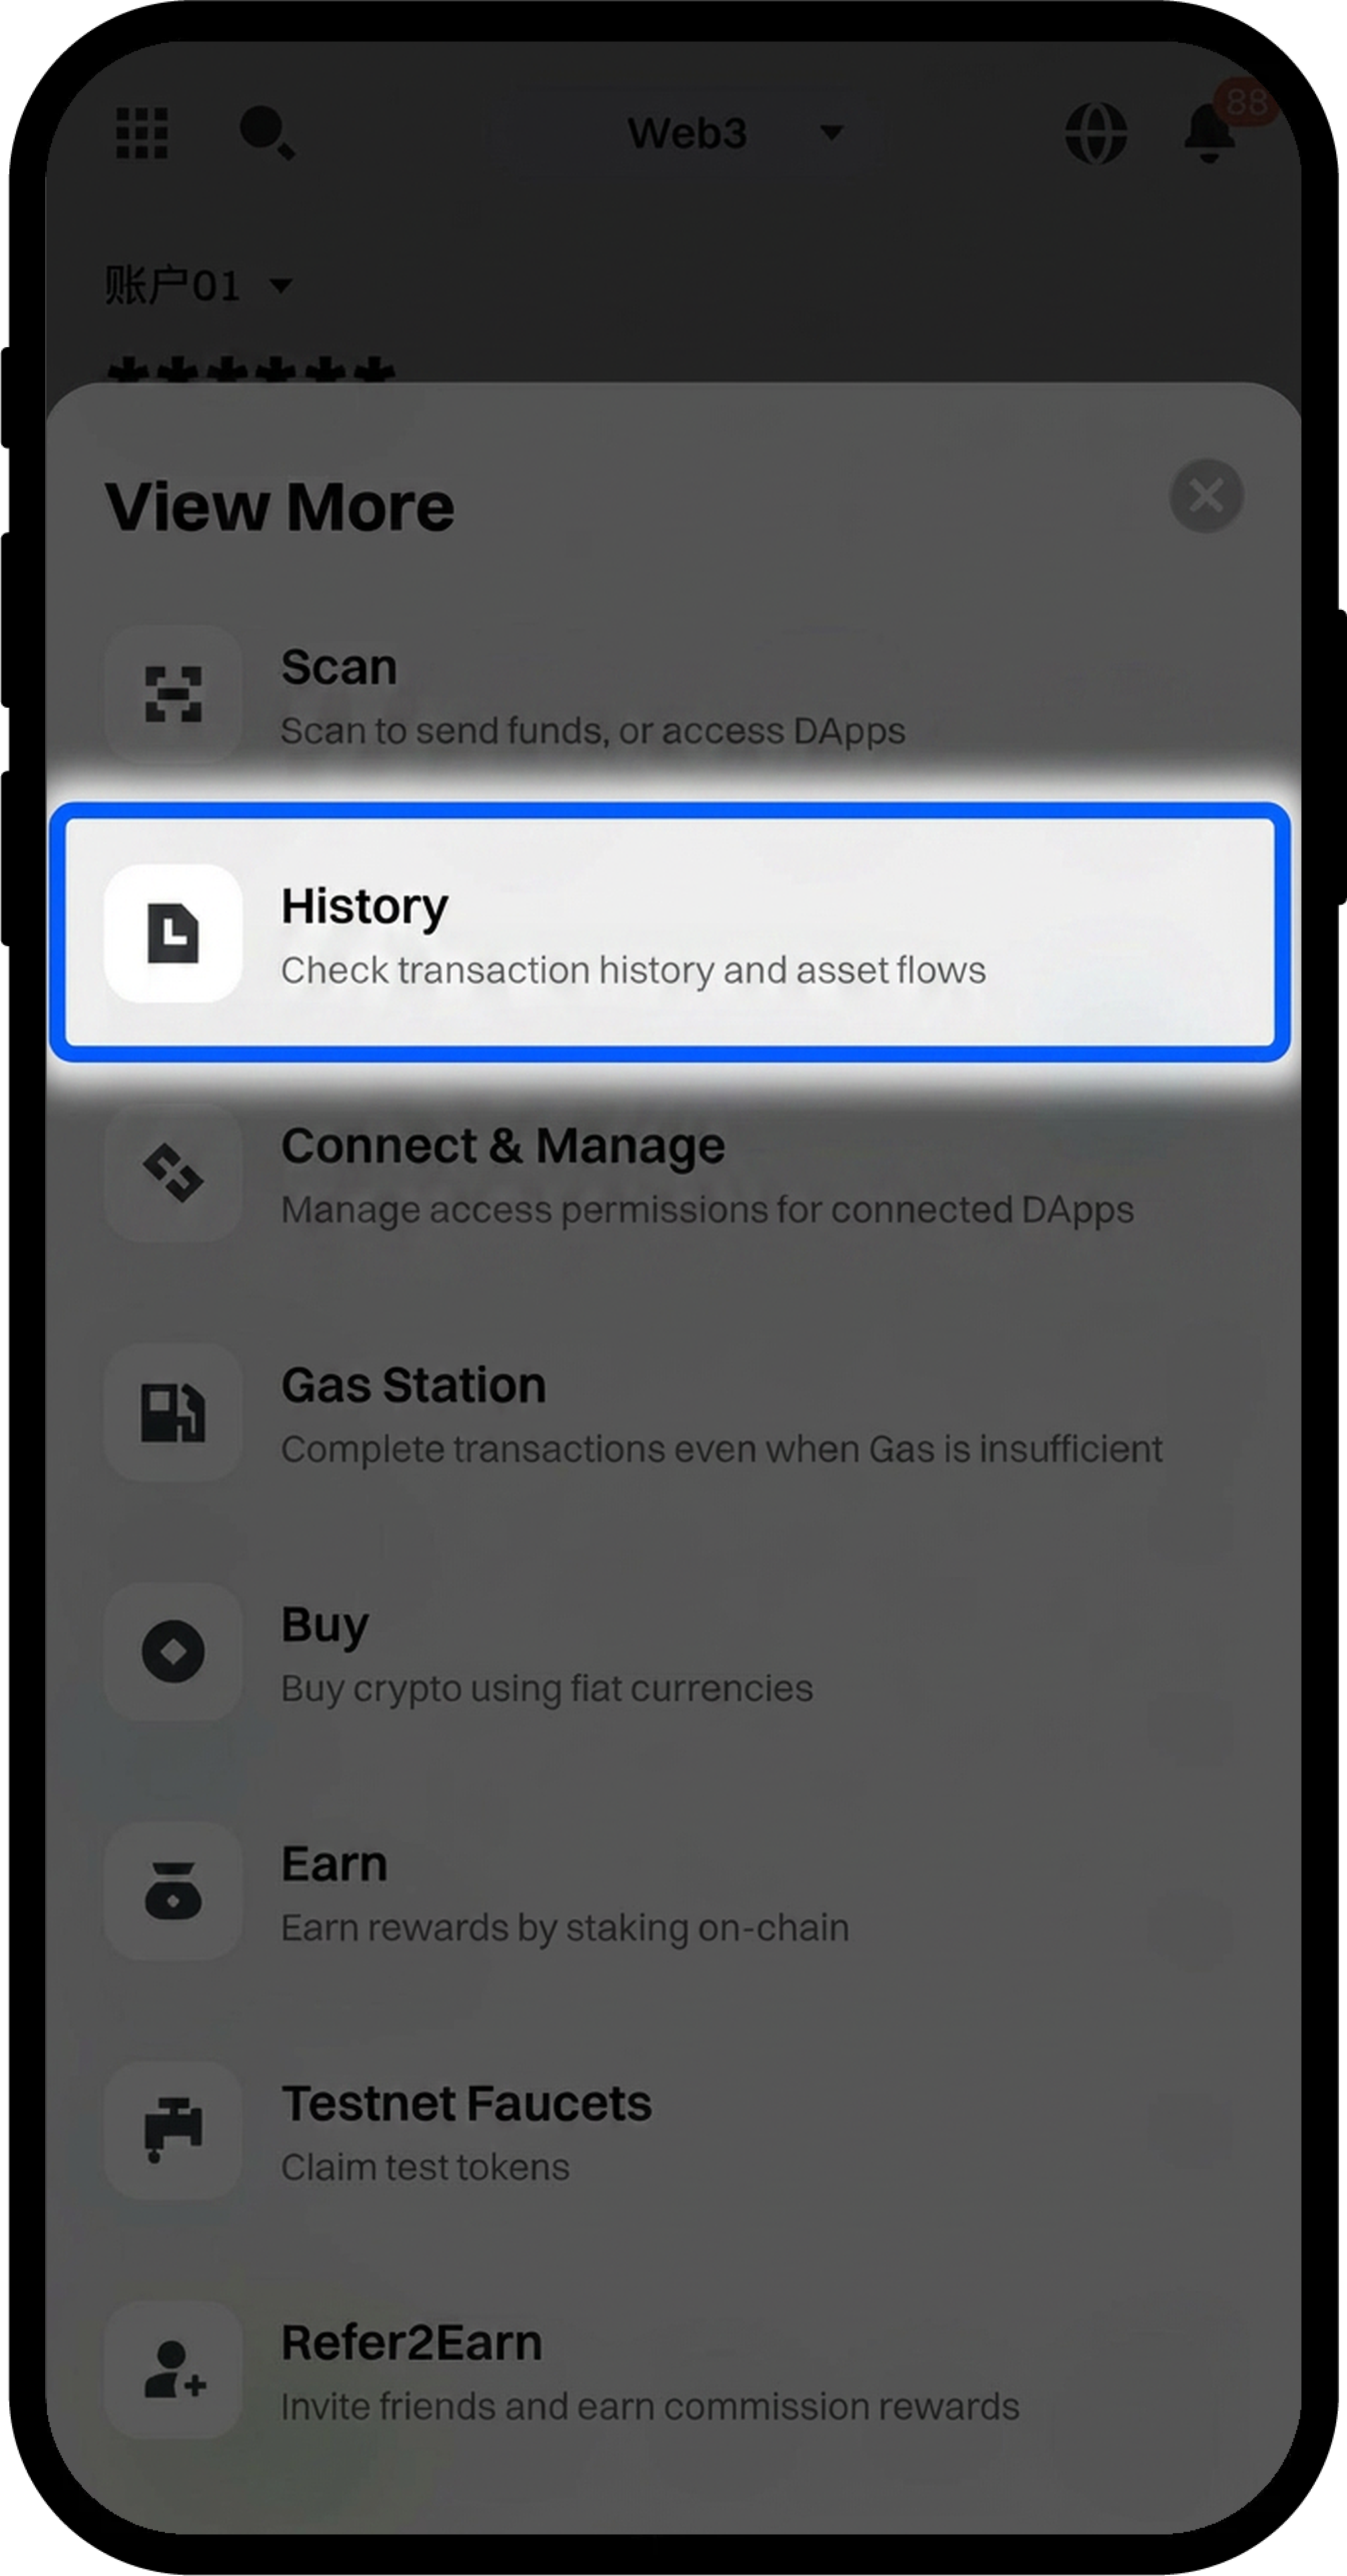
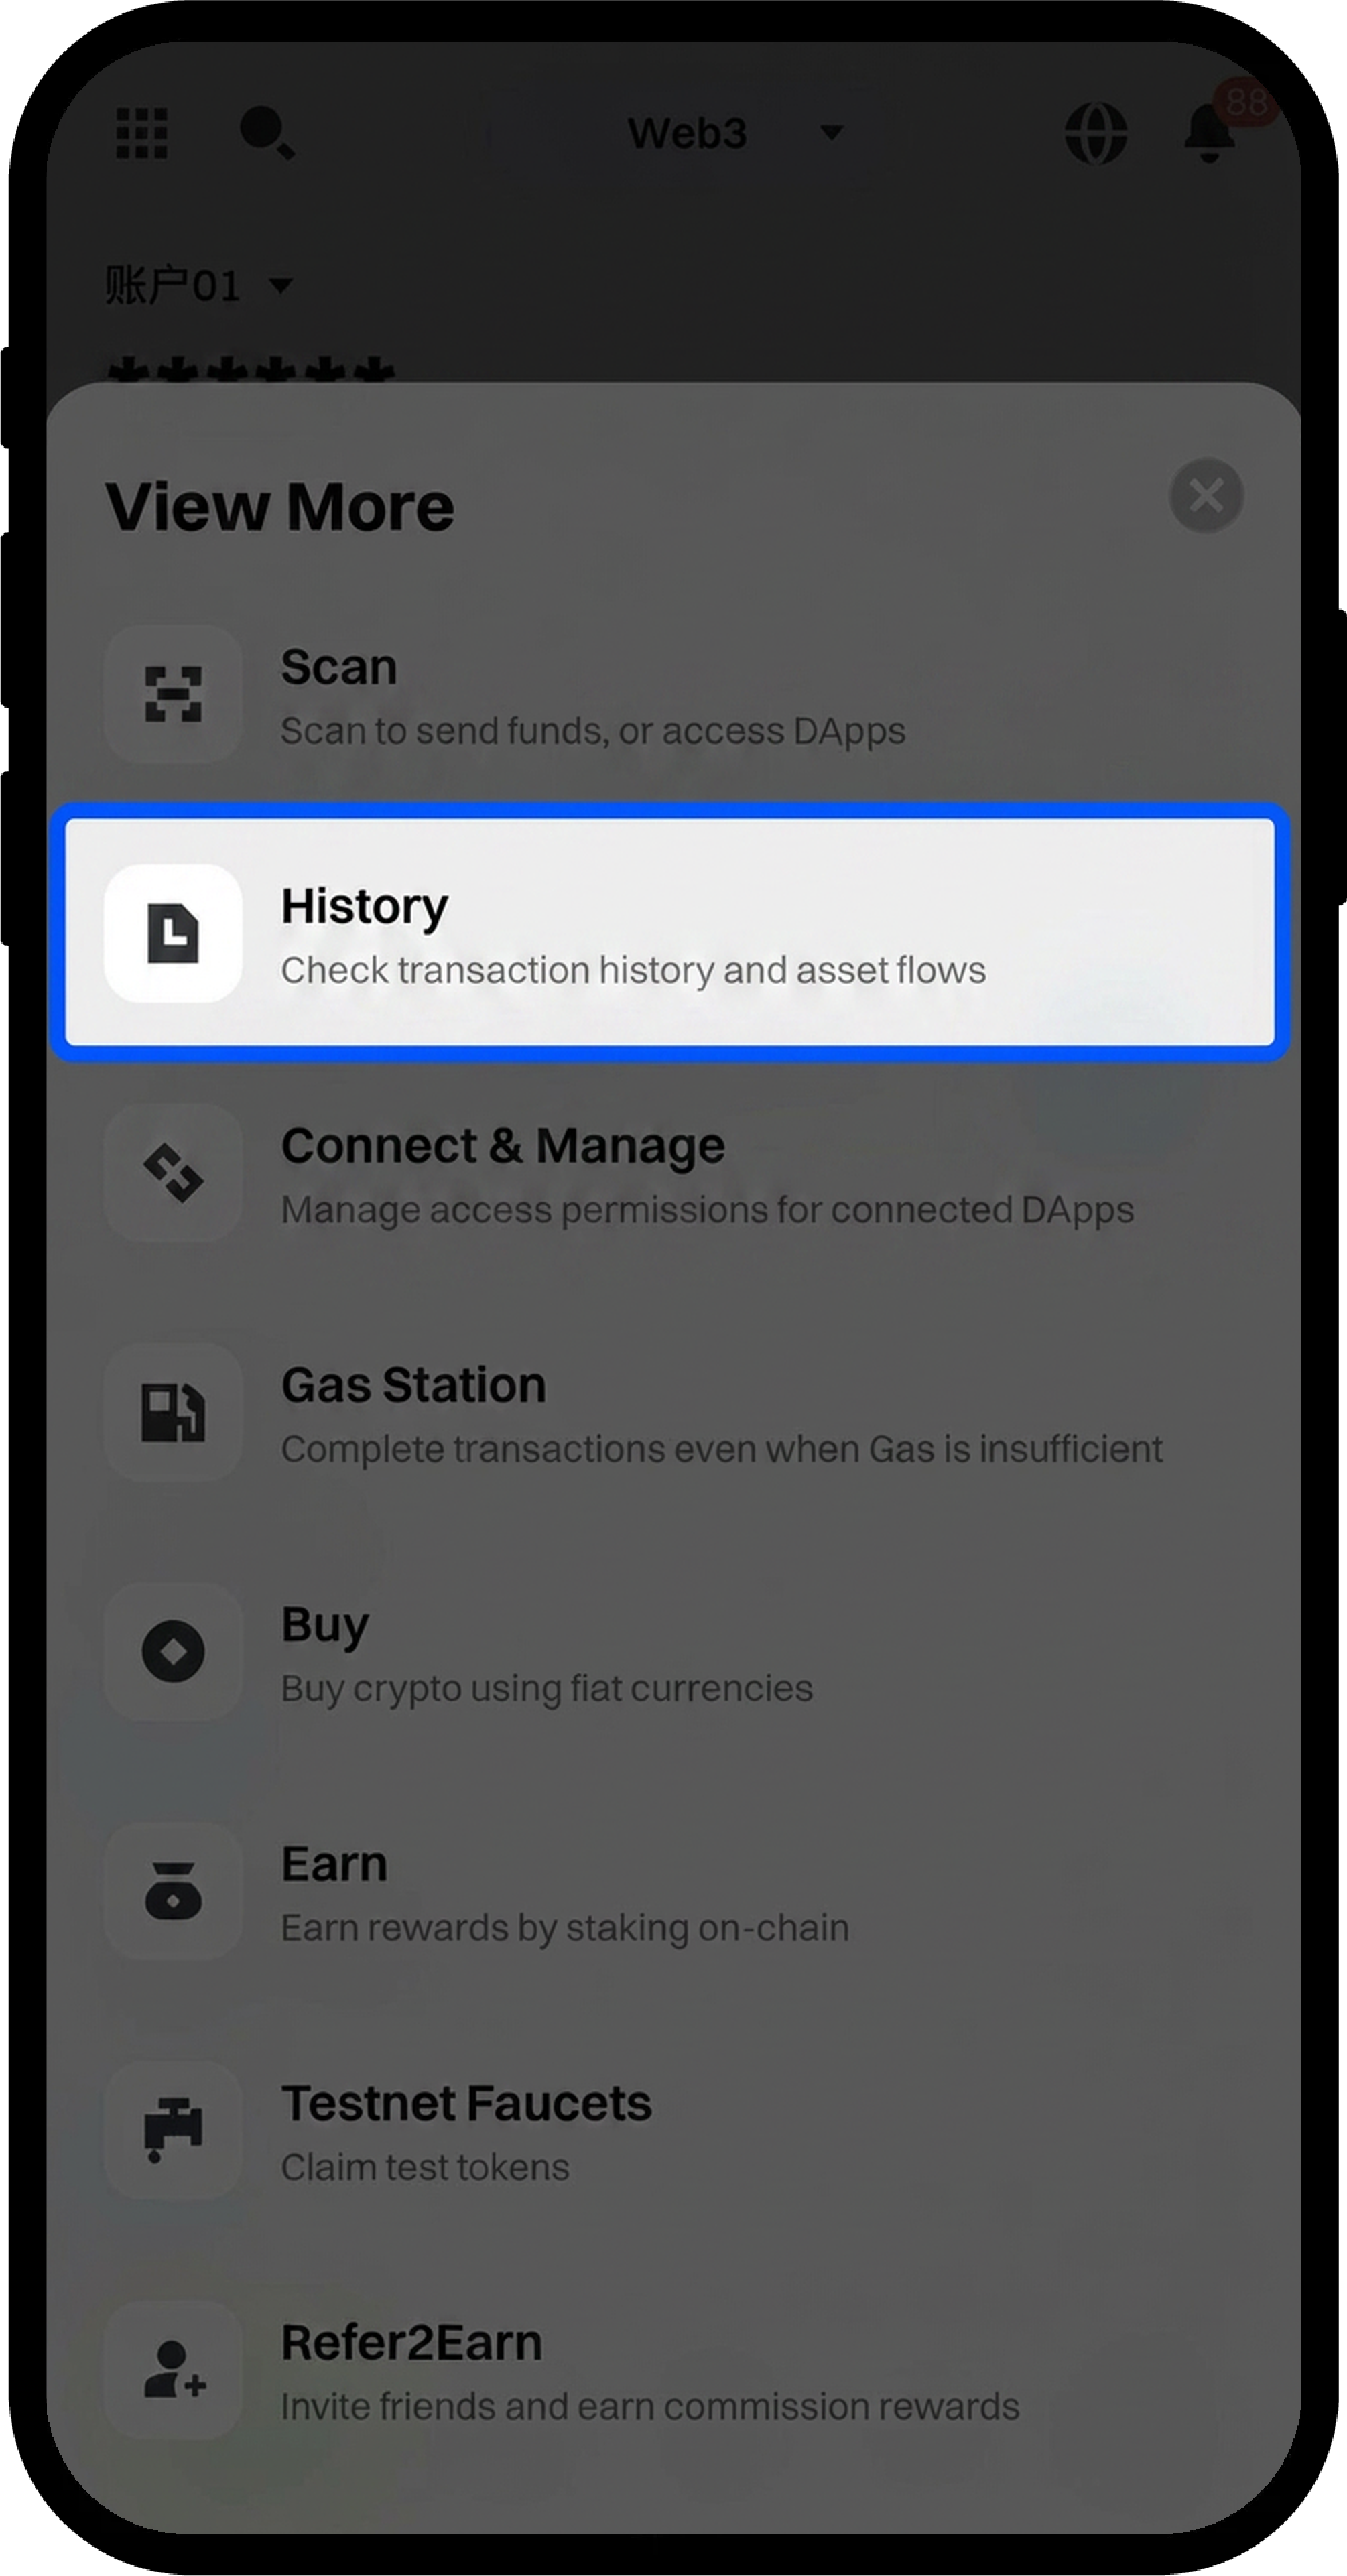
- After completing the transfer from your source wallet, check the transaction progress on the "History" page of the Google Chrome Extension homepage.
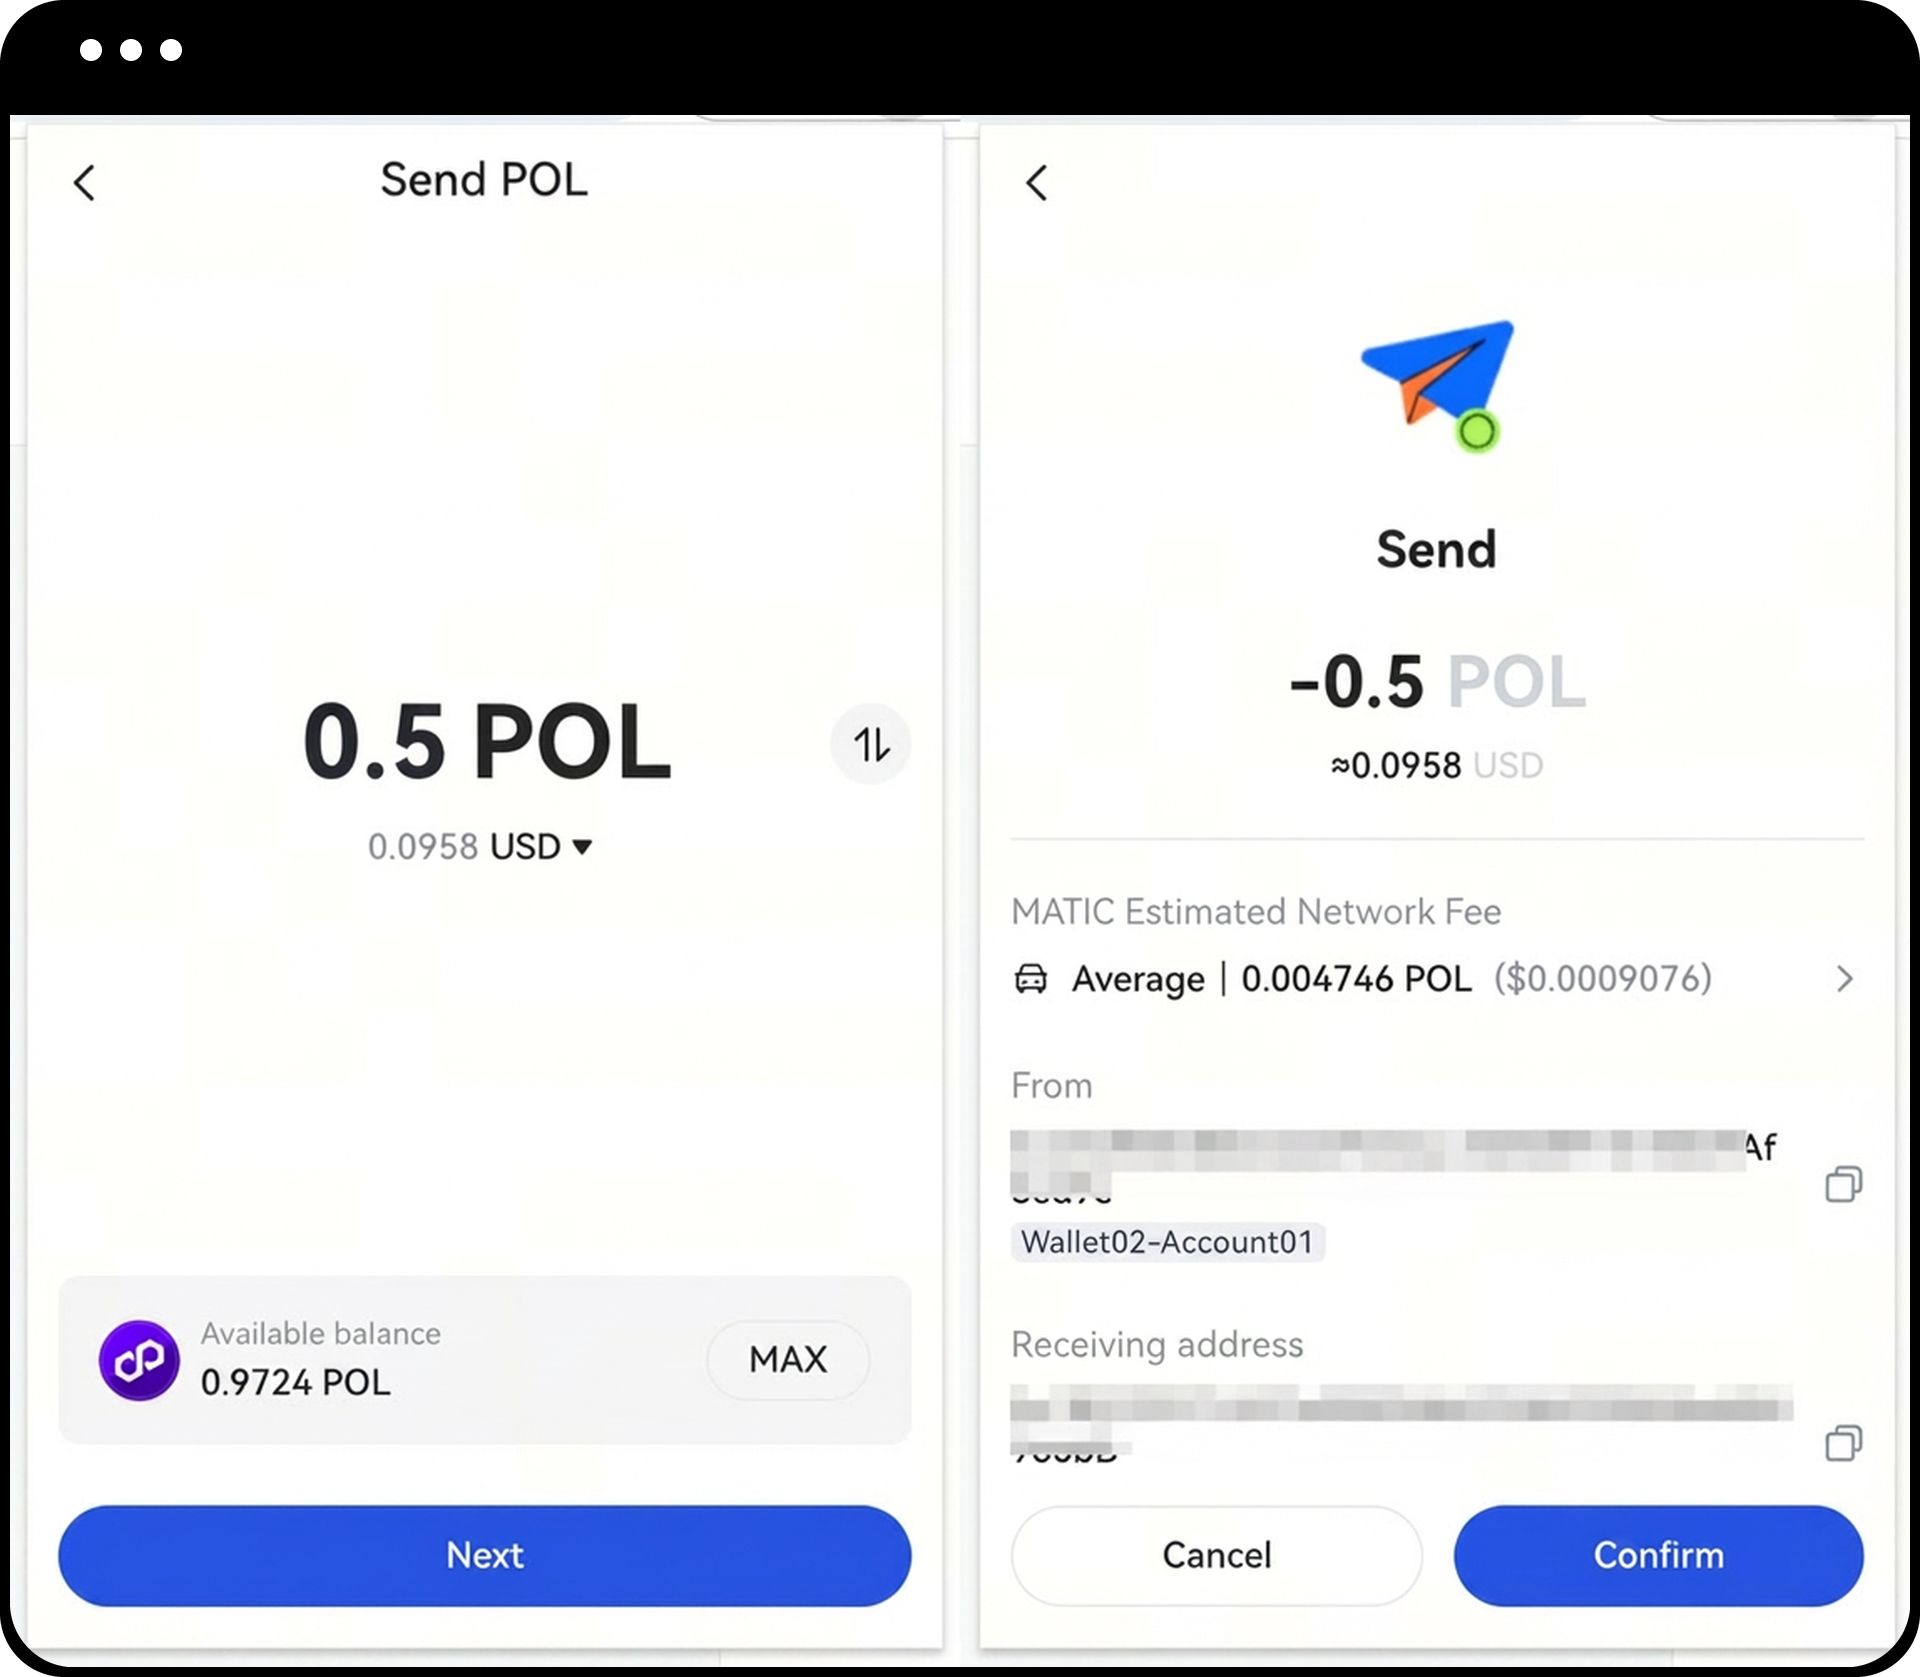
Step 3: Transfer Funds from Your Wallet
- On the Google Chrome Extension homepage, click the "Send" button.
- Select the token and token network you want to send.
- Enter the following information:
- Number of tokens to send
- Recipient wallet address
- Review and confirm:
- Sending amount
- Recipient wallet address
- Network fee (gas fee)
- Click "OK" to confirm the transaction.
- After completing the transfer, check the transaction progress on the "History" page of the Google Chrome Extension homepage.
Notes
- Keep your password and mnemonic phrases secure. Gate does not store this information, and lost credentials cannot be recovered, resulting in permanent loss of access to your assets.
- Ensure you have sufficient network tokens in your wallet to cover gas fees before initiating any transfer.
- Always verify the recipient address, token type, and network before confirming any transaction to avoid irreversible loss of funds.
- Different blockchain networks have different confirmation times; please be patient while waiting for transaction completion.
FAQ
Q1: What should I do if I lose my mnemonic phrases or password?
A: If you have created a cloud backup through the Gate App, you can restore your wallet using the "Restore Cloud Backup" option. Otherwise, lost mnemonic phrases or passwords cannot be recovered, and your assets will be permanently inaccessible.
Q2: Why is my deposit not showing in my wallet?
A: Blockchain transactions require network confirmations, which can take varying amounts of time depending on network congestion. Check the transaction status on the "History" page or verify the transaction on the blockchain explorer using your transaction hash.
Q3: What happens if I send tokens to the wrong network?
A: Sending tokens to an incorrect network may result in permanent loss of funds. Always ensure you select the correct network that matches both the sending and receiving wallets before confirming any transaction.
Q4: How much gas fee do I need to reserve for transfers?
A: Gas fees vary depending on network congestion and the blockchain you're using. It's recommended to keep a small amount of the network's native token in your wallet to cover transaction fees. The wallet will display the estimated gas fee before you confirm the transaction.
Disclaimer
The content provided herein is for reference and educational purposes only and does not constitute any financial, investment, trading, or legal advice, nor does it constitute an offer or solicitation to buy or sell any digital assets. Gate makes no express or implied representations or warranties regarding the accuracy, completeness, or timeliness of the information contained herein. Product features, interfaces, rules, and fee structures may be updated or adjusted at any time. Please refer to the latest announcements and the actual information displayed on the Gate platform for the most accurate details.
Digital asset investments involve significant risk, and prices may fluctuate substantially. You may lose the entire amount of your investment. Please make decisions cautiously based on your own financial situation and risk tolerance after fully understanding the associated risks. If necessary, you are advised to consult an independent professional financial or legal advisor.
For more information about potential risks, please refer to Gate's Risk Disclosure and User Agreement.
